So you’re rocking your natural nails. Good for you! Not only is this a good decision for the health of your nails, but it can save you quite a bit of money and upkeep down the road. However, there are a few things required to maintain beautiful natural nails. One of the major components of that is learning how to file your nails correctly.
I know we’ve all seen the mean girl on our favorite 2000’s show furiously filing away at her nails, but how do you file your nails properly? I’m going to give you a simple, short and sweet guide on how to use a nail file to achieve your shape of choice and keep your nails at the length you want.

Step by Step
Filing nails is actually quite simple. The trouble comes when you overdo it. Luckily, I’ve got all you need to know in a quick guide that only takes 5 steps!
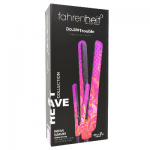
1. Get a High Quality Nail File
First things first, you always want to ensure that your tools are the best and most efficient. In this case, the tool we will need is a high quality nail file. Spend the extra dollar or two and splurge on a proper nail file. What does a high quality nail file look like? Most nail care specialists would agree that a glass option works longer and better than the nail files you might have seen before.
2. Choose your Shape
Next, choose the shape of your nails. There are so many options that you could decide from. However, the length of your nails should help narrow it down. For example, if your nails are long, you might want to try almond or coffin nails, but if your nails are short, maybe a square or squoval nail would look more natural. Play around with some different options to find your favorite.
Keep in mind certain shapes are more durable than others, so if you are worried about your nails breaking, try a square, oval, or something along those lines rather than sharper shaped options.
3. One Direction
This is going against the grain of everything you may think you know about nail filing. Instead of the tradition back and forth filing that we all know, the best way to file your nails is actually in one direction. I know. Shocking. However, this ensures a smoother file, less mistakes, and overall easier. This may take a few tries to train your brain to start filing this way, but I promise you will see the results when you get the hang of it.
This also can help reduce the damage done on your nails, and when you’re working with your natural nails, the less damage the better. Our fragile nails need attention and care that acrylics may not.
4. Take your Time
When you’re talking about weeks of nail growth and care, the last thing anyone wants it to mess up or ruin it before you’ve hardly even begun! This is why it is so important to slow down, not rush, and let yourself focus on the task. You’ll be grateful you set aside the extra 5 or 10 minutes when you are rocking beautifully shaped nails for the next few weeks. This isn’t a race, afterall. Just nail filing!
5. Outside In
To ensure you get an even shape and work efficiently, work from the outside in. This is especially helpful with oval or pointed shapes that take a bit more precision. This can also help find the perfect middle ground to ensure that your nail is not lopsided by the end. Be sure the flick underneath the nail and pull out any leftover residue from filing when you’re desired shape is fully complete.
Conclusion
There you have it. That wasn’t so hard, no? Now that you know how to file your nails correctly, you can focus on finding the perfect color to complete your look. Maybe you want to try something spicy. Perhaps a little more calm and versatile? Also, if you do tend to lean to the more fragile side, try adding a nail strengthener before your polish. This can make a huge difference and save yourself from a broken nail. Let your technique shine through and go grab your file!