If you’ve ever been to a nail salon, you know that somewhere on the walls or the windows, you’re bound to find a poster or picture of french-manicured hands. It’s the most classic nail art and spans across a variety of cultures, despite the word “french” in its name.
It’s a simple look and timelessly popular. From weddings and fancy dinners, to wild weekends and work presentations, this type of nail look will fit the scene. From the light pinkish hue on the nails to the whitest of tips, you can never go wrong with a french manicure.
Although the slim, white tips may be intimidating and you may be tempted to leave it to the salon professionals, it’s possible to achieve beautiful french tips on your own. After all, practice makes perfect! So, let’s dive into the DIY French Manicure process!
1. Wash Your Nails
Before going ahead with french-manicuring your nails, you’ll want to make sure you have a fresh, clean base to start with.
Begin by removing any old nail polish with a remover that’s free of acetone and then washing your hands with soap. If you have press on nails you need to take off, check out our post on how to remove them before washing your hands. Doing this step prepares your nails for a great manicure, so be sure not to skip it!
2. Time to Shape
A French manicure will work on any nail shape, but most nail professionals encourage a short square or almond shape for a french tip manicure. So, pull out the file and shape your nails according to your preference before moving forward with the next step.
3. Give them a Buff
In every salon, when administering a manicure, professionals always make sure to buff the nails. Why? Well, because nails that are gently buffed actually support polish in staying better on the nails. For best results, get yourself a high-grit buffer and focus around the cuticles.
4. Hydrate the Skin
Next, you’ll want to push your cuticles back, but before doing so, soak them in oil. Then, be sure to use a body scrub to exfoliate your hands. Finish off this hydrating portion by applying some hand cream. But, before moving onto the next step, use alcohol and nail polish remover to dehydrate the nail plate and remove any excess hand cream residue from the nails.
5. Base Coat
Now, it’s time to actually begin painting your nails! For your perfect French manicure, you’ll need two color polishes – one for the nail and one for the tip. Before anything else, apply a base coat. Doing so will prevent any stains to the nail and make the manicure last longer. At every salon, nail techs never skip the base coat – that’s telling of how important this step is!
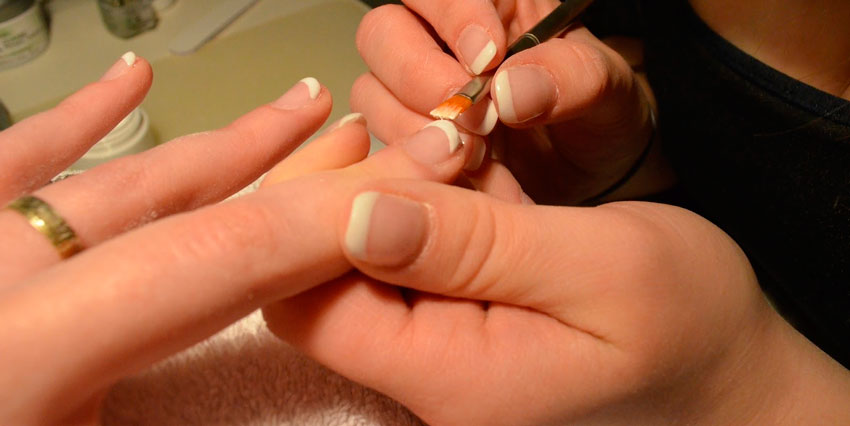
6. Paint Nail Tips
Using a fine polish brush, paint a curved white line at the tips of your nails. You may also do straight lines – that’s up to your nail shape and personal preference.
7. Pink Polish
Next, once the white tips have had time to dry, apply a sheer pink coat. This will give your nails that nice, pink, freshness that’s come to be known with french manicures.
8. Top Coat
In this last step, you’ll want to clean away any excess or stray polish using a Q-tip soaked with nail polish remover. Finally, you’re ready to apply a thin layer of beautiful, shiny topcoat. This last layer will keep your French Manicure looking perfect and protect all your work!
Conclusion
All in all, completing a french manicure isn’t an impossible task. With the right tools, you can achieve your own stunning at home french manicure and end up with salon-quality nails. To bump up the fun, consider doing your manicure with a friend. Set up your own home nail salon, play your favorite tunes or turn on some netflix, and go to town!
Hope this post has helped you learn more about manicures and how to french tip nails. Remember, painting your nails is a fun task, so above all, relax and make sure to have some fun!