Eyeshadow can be the pop of color that a makeup look needs for a night out or a simple everyday look. With any color imaginable, eyeshadow colors can say anything you would like. However, if not done correctly, they can look blocky and unflattering.
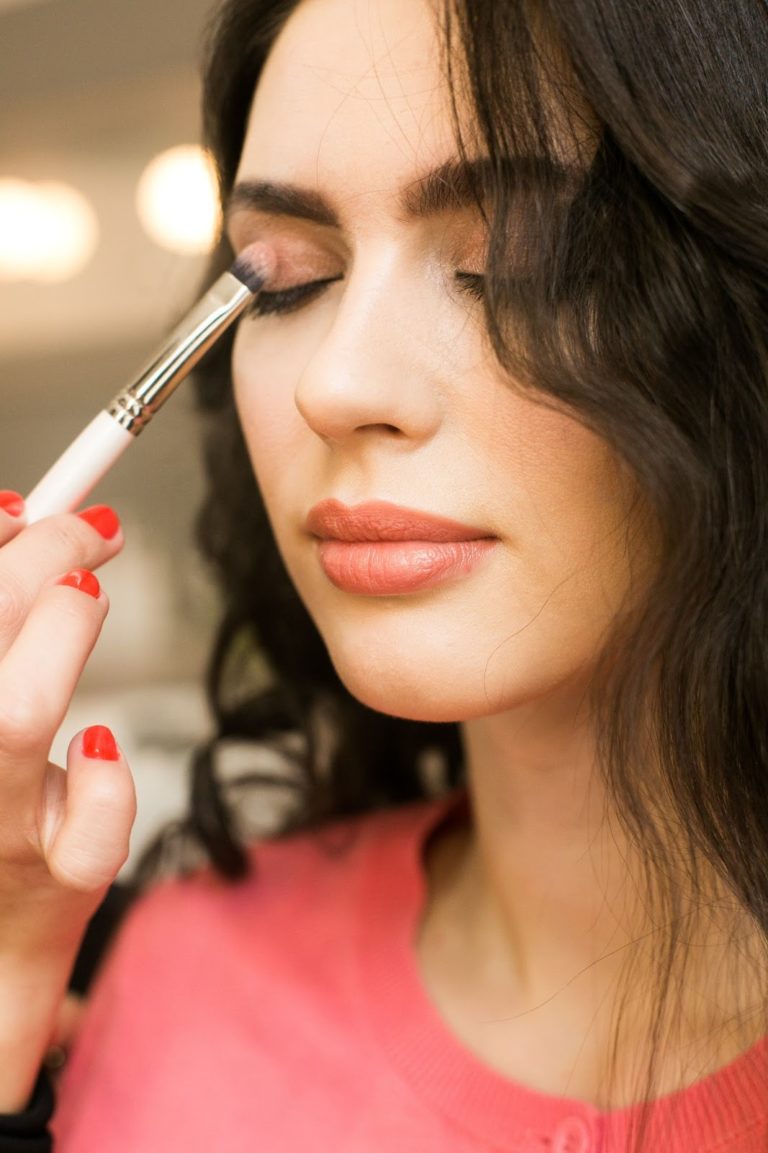
The key to a good eyeshadow look is blending. This removes the harsh line dividing where the eyeshadow begins and ends. This may seem like an easy task, but most people, myself included, struggle to perfect blended eyeshadow. Not to worry, however, I have been able to master it and you can too with this easy step by step guide.
1. Pick your Colors
Depending on the type of eyeshadow look you are wanting, you will need 1 to even 4 colors to execute the look. For a simpler look, try a warm brown color overall. This pairs best with a darker brown to blend, but it is up to personal preference. For a smokey eye look, grab a darkest color, black or brown, a step up, a light color, and a highlighting color. There are loads of other options such as bright blended looks or pops of color, but we will focus on the basics for now.
2. Pick your Brushes
Brushes are the most underrated step of blending eyeshadow. If you do not have the right brushes, blending eyeshadow is near impossible to executive well. Grab a medium eyeshadow blending brush to start. This will be a medium brush with longer bristles to fully blend. When you find the perfect blending brush, it is game over. You are set for blending moving forward, so don’t skip this step or rush over it.
Shorter or contour brushes are useful for more precise pigment, but not for blending. A flat, short brush can lay a color on the lid after a base color is blended. This is typically a highlight color or a very bright color in the same family as the base color. A small contour brush can create an eyeliner look with a dark eyeshadow for a less harsh eyeliner look.
3. Learn your Eye Shape
Another crucial step to master blending eyeshadow is to learn your eye shape. There are loads of eye shapes and each will need to lay eyeshadow on differently. The easiest eye shape to work with eyeshadow on is a large lid eye. A few eye shapes fall into this category, but rule of thumb is if you can look forward and still see a large part of your eyelid, this is you. Unlike other eye shapes, you can focus on the eye shadow rather than forming the eye shadow around your eye. This is great for smokey eye looks, radical colors, and dramatic eyeliners.
Hooded eyes and monolids are more difficult to blend eyeshadow on because the eyeshadow needs to be strategically placed to be noticeable when your eyes are open normally. The best way to work with this eye type is to aim higher than comfortable. Blend above the eye socket rather than directly on it. If you add liner or eyeshadow liner, keep it thin. Larger liner will cover the entire section of your lid that is visible. You can also make your eyelids appear larger with strategic highlight shadows on the lid. We’ll go over that later.
Knowing your eye shape doesn’t put you in a box, though. No matter your eye shape, you can still try out creative and bright looks, there just needs to be consideration of the eye shape put into those looks.
4. Apply a Good Base
Perfectly blended eyeshadow does no good if it comes off within the first hour. Find a good base that will keep your eyeshadow on all day. There are some options. You can use an eye primer, concealer, or even a cream eyeshadow as a base to brighten the pigment of your eyeshadow look. Certain options work better with certain looks. It is useful to have all three options on hand to fit your look for the day.
Typically, I stick to eye primer to keep it safe. Think of this as the velcro that holds your eyeshadow in place. Be sure to give the primer or concealer time to dry before you begin blending. If not, the shadow can stick unevenly and look patchy.
5. Main Color
We are finally ready to begin blending. Grab your color pallet you chose, the blending brush of choice, and begin packing on the lighter shade. You can tap the excess off to prevent fallout. Start small and grab more if you need to. A little goes a long way, and blending will take a minute.
For large lids, stop packing at the eye socket and blend from there. The shadow will move up a bit, and that’s okay. The majority of the shadow should stop at the socket. For hooded eyes and monolids, start right above the socket and let it blend slightly higher. Try not to move close to your eyebrow.
6. Blending Color
Finally, grab the darker color and blend around the outer corner into the middle of your lid. This can be as dark or light as you would like. We want to create some depth. If you like, add some highlight onto the inner corner or middle of your lid.
Follow and master these six easy steps and you will be an eyeshadow blending queen!