Contouring is quite a useful makeup tool when used properly. Originally created to create a more defined and thinner looking face, people have jumped all over the concept. There are quite a few ways to contour: powder, cream, and plenty more. However, have you ever heard of contouring with a self tanner? Self tanner contour is quite the game changer. No more reapplying contour everyday with your makeup. Built in contour? Count me in.
So how do you start contouring with self tanner? Lucky for us, completing a tan contour is not as difficult as one might assume. Quite the opposite. Follow a quick step by step guide and even the least gifted makeup artist can complete a self tanner contour.
Why Self Tanner Contour?
What’s the benefit of tan contouring over standard contour options? The biggest perk of this method over others is for those who like to rock a no makeup look often. This gives the no makeup look an extra umph with a natural contour. However, even with light makeup, the self tanner contour will show through and allow for you to apply a bit of light foundation and be on your way.
The self tanning contour also lasts for a few weeks, so you don’t have to worry about adding anything else until the time rolls around for another tanning application.
If you are the type who prefers a full face of makeup on a normal basis, then this might not be the look for you. With a heavy foundation that has great coverage, the tanning contour won’t be able to show through. Weigh out your options to decide which category you fit into best.
Step by Step Self Tanning Contour
1. Right Products
Like any makeup trick, the most important part is to get good quality products to complete the look with. Even executed perfectly, a bad product will ruin the look whether that be from the wrong shade, premature fading, or a cakey complexion.
When it comes to self tanner, it’s best to stick with quality even if it costs an extra dollar or two. This will ensure that it stays for a decent amount of time and the color of the self tanner looks natural. Also, take the time to find the right shade for yourself to make sure you don’t look orange or washed out with too light of a complexion.
2. Exfoliate
Before we can move into application, we have to make sure our face is prepped to add the contour. This is where exfoliation is so important. Removing the dead skin allows for the tanner to sit on your skin better and stay longer. This can be done in a few ways.
Grab a physical exfoliator and gently rub your skin with this to remove dead skin. However, you can also use a chemical exfoliator, which many people swear by as a better option for less damage to the skin. Rub a small amount all over the face and let it do the work for you!
3. Application
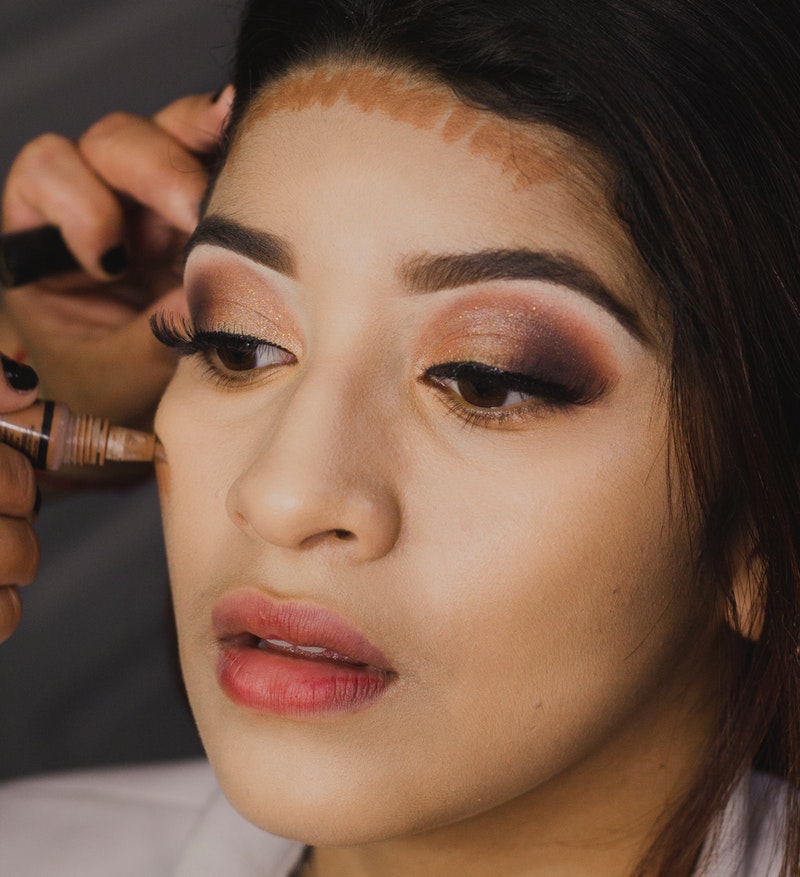
Next on the list is learning the proper way to apply the contour. Lucky for us, this step is just like any other form of contouring. The only difference is you will need to blend the tanner quickly to prevent harsh lines from setting in. Using a good applicator will also help. Some prefer beauty blenders while others use a brush or their fingers, so choose the option that works best for you.
Focus on the forehead, cheeks, and chin. The best way to ensure you get the most out of the contour is to contour is a 3 shape. Start at the center of the forehead, wrap around to the cheek forming the middle of the 3, and finish out the 3 on the chin. Repeat the reverse of this on the other half of the face and voila! The application process is complete.
4. Let it Set
Lastly, let the self tanner sit on your face and soak in. The tanner will develop over the next few hours, so don’t overdo it. Results will grow. Wait at least 6 hours or more before washing your face to prevent removing all of your hard work. Now, enjoy your newly semi permanent contour. Say goodbye to long morning makeup routines and hello to sharp jawlines and cheekbones.