Want a natural-looking face tan? Tired of wearing makeup to even out face and body color? Is it winter time and the last thing you want is to leave home for your tan appointment?

If you answered yes to any of the above, self-tanning your face is the solution. This may seem intimidating, but if you’re using the right products and techniques, you should have nothing to worry about.
We have put together this quick guide to walk you through how to self tan your face and maintain a natural-looking tan all year long. Let’s begin!
What is Self-Tanner?
Self-tanning products provide glowing skin in a bottle. The active ingredient is dihydroxyacetone (DHA) which works by interacting with the top layer of the skin. Essentially, it forces it to develop color and mimic the results of spending a full day out in the sun or under a tanning bed.
Many people opt for self-tanner because it offers a sun-kissed look without the rays of the sun – which are known to be quite damaging and aging to the skin. If this sounds like something you’d like to try yourself, keep reading for a complete step-by-step guide.
1. Select the Right Self-Tanner For Your Skin
Before tossing a self-tanning product to your cart, think about the type of skin you have. Do you have oily, dry, normal, or acne-prone skin? If you are prone to breakouts, for instance, go with a self-tanner that is non-comedogenic. This will help prevent the blockage of pores that essentially leads to these breakouts. Not all face tanners are made equally, so be sure you go with one formulated for your skin type.
The other factor to consider when picking a self-tanner is the shade. Facial products have the tendency to be formulated lighter, which is why a body self-tanner may not work as well on the face.
Can you put self-tanner on your face? Yes, you can use body self-tanner on your face if you can’t find a facial product that complements your skin color. If you choose to go down this route, dilute the body self-tanner with a non-oil-based moisturizer to help lighten it.
2. Prep Your Skin
You want a clean base before you apply self-tanner. Try these cleaning and moisturizing tips for best results:
- – Cleanse. Thoroughly clean your face and neck using an oil-free cleanser. Avoid oil-based cleansers since they can prevent the self-tanner from absorbing evenly.
- – Exfoliate. Remove dead skin using a gentle face exfoliator. Do this a few hours before application – NOT right before you self-tan.
- – Avoid Skincare Products. For optimal absorption of your self-tanner, avoid using any type of skincare product right before or right after application.
- – Close Pores. Cool your face before applying the self-tanner with an ice cube or cold washcloth to close pores. Also, fully dry your skin to prevent your tanning product from clogging pores.
- – Moisturize. Add a little bit of moisturizer around your eyebrows to protect them from the tanning solution. If you also want to enhance the look of your brows, check out this guide here.
-
Pro Tip: It is best to tan your face at night because the product will sit and develop overnight. This leads to a more even tan. We advise you to set an alarm clock and consider this extra step as part of your evening skincare routine.
3. Apply Self-Tanner

Don’t be intimidated when applying for self-tanner. Make sure to thoroughly review and follow the instructions on the packaging along with these tips. Doing so means you can rest easy knowing you’ll achieve a flawless, sun-kissed result on time.
- – For spray tan mists. Hold 4 inches from skin and spray in a downward direction on the center and sides of your face.
- – For cream self-tanners. Use your fingers to massage the product onto your skin gently. Apply evenly going up to the hairline, sides, back of neck, and around the ears. Do not forget to apply an even layer on ear lobes as well.
- – For application before bed. Applying a self-tanner at night gives it more time to develop. Apply some translucent powder over your self-tanning product to help it set and prevent it from smudging while sleeping.
-
You also have the option of using a pigmented self-tanner. These products are great to add dimension to the face through the process of contouring. You can apply some contour after you apply self-tanner. Simply grab a makeup brush (or use your fingers) to add pigment under the jawline, arches of brow bones, and across your cheekbones.
4. Post-Tan Care
Achieved a flawless result? The process of self-tanning your skin doesn’t stop there. You want to learn how to care for it afterwards for a lasting result.
Here are a few simple ways to keep your tan looking beautiful. For a few days after self-tanning your skin, consider this simple skincare routine:
- – Avoid exfoliating
- – Use oil-free moisturizers
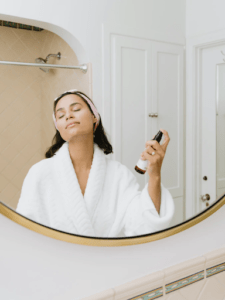
- – Mist skin with a lightweight serum to hydrate skin
- – Use sunscreen
- – Avoid products with exfoliants or retinoids as they may dry out the skin
-
Final Thoughts
Self-tanning the skin may not be for everyone. However, using the tips and tricks above, you’ll have a lovely bronze all year long. Always remember to select the right self-tanner, prep your skin, apply the product correctly, and practice post-care. When you are ready to apply some fresh color, exfoliate your skin to remove dead skin cells and begin the cycle all over again!
For more skincare tips, be sure to check out our amazing resources at HHBeauty.


