Professional nail techs cringe at the thought of someone removing acrylic nails themselves. Not only can this be painful, but when done incorrectly, it’s extremely damaging to our natural nails.
Attempting to take shortcuts when removing acrylics at home leads to painful experiences. If your first thought is to rip them off, keep reading. The following tips and tricks will teach you how to safely remove them in the comfort of your own home. It will take longer than a nail tech doing it, but you’re saving yourself a trip to the nail salon, money, and a boatload of pain!
What’s the best way to take acrylic nails off? Keep reading to learn the secret your nail tech won’t spill.
The Secret to Acrylic Removal at Home
The first thing you need to know about taking off your acrylics is that it will take some time. You need to set aside at least an hour of your day to dedicate to your nails. I know this sounds like a long time, but it’s the only way when your manicurist isn’t an option.
Plus, I promise it’s not that bad once you put on your favorite show on Netflix or play some soothing music. It may even be – dare I say it… RELAXING!
Follow these simple steps to ensure the safe removal of your acrylics without damaging your natural nails.
Step 1: Gather Your Tools
Ask yourself, “What would my nail tech do?”. Well, for starters, they would have a well-ventilated and clean station with all the necessary materials. After you’ve decided upon your station, place a towel on the surface you’ll be using. This will protect your table from the harsh chemicals of acetone.
Next, gather the following tools:
- – Nail clippers
- – Nail file
- – Pure acetone
- – Orange stick or cuticle pusher
- – Cotton balls
- – Foil
- – Small bowl
-
Step 2: Cut Down Your Acrylics
Once you’ve gathered all the necessary tools, it’s time to begin the acrylic nail removal process. Trim down acrylics as best you can without getting too close to the nail bed. For this step, you’ll want to use your nail clippers to cut nails down and then the nail file to smooth out the edges and continue to file them down as much as possible.
Step 3: Remove Nail Polish
If you’ve painted your acrylics with regular nail polish, you can remove the polish with a nail polish remover. If you don’t have nail polish remover, use acetone. If you have gel polish on, you’ll need to file it away using a coarse nail file. You want to remove the shiny topcoat and then get into the acrylic.
The more of the acrylic nail you can file off, the less time you’ll spend soaking your fingers in acetone later. Make sure to leave behind a thin layer of acrylic. This will protect your natural nail from accidently filling it down too much. Plus, don’t worry if you can’t get all the acrylic off – the acetone will remove it.
Step 4: Soak Nails in Acetone
There are two easy ways you can achieve this step. The first method involves using cotton balls and aluminum foil squares.
- Soak a cotton ball in acetone and place it over the acrylic nail.
- Wrap it tightly with the foil and give it a squeeze. Don’t be alarmed if some acetone drips out of the foil. This is a good sign you’ve used enough acetone.
- Soak your nails for 20-30 minutes to ensure the acrylic breaks down properly.
The main tool when removing acrylics is acetone. Therefore, if you don’t have foil and cotton balls, follow these instructions:
- Pour acetone into a small bowl.
- Submerge your fingers until your nails are completely covered.
- Leave in the acetone for at least 20 minutes.
- Wash and dry your hands.
- Apply some hand lotion as your hands may be a little dry.
Both methods will work wonders at breaking down the acrylic. If your time is up and the acrylic hasn’t softened, soak your nails for an additional 5-10 minutes. Remember I mentioned this required time and patience? Don’t rush the process, otherwise, you’ll end up right where you started.
Step 5: Push Acrylic off Your Nails
Using your orange stick or cuticle pusher, push the acrylic off of your nail. Start at the cuticle area and push gently down to the free edge. The acrylic should come right off without having to use too much pressure. If it doesn’t come off easily, repeat the previous step.
Step 6: Shape, File, and Buff
Successfully removed the acrylic? You’re in the home stretch! Shape and file your nails to your liking. Then, lightly buff the tops of the nail bed to soften up any roughness.
You should also apply some cuticle oil on your cuticles and the side of your fingers. This will moisturize your nails. After all, this entire process will leave your nails feeling dry.
Final Thoughts
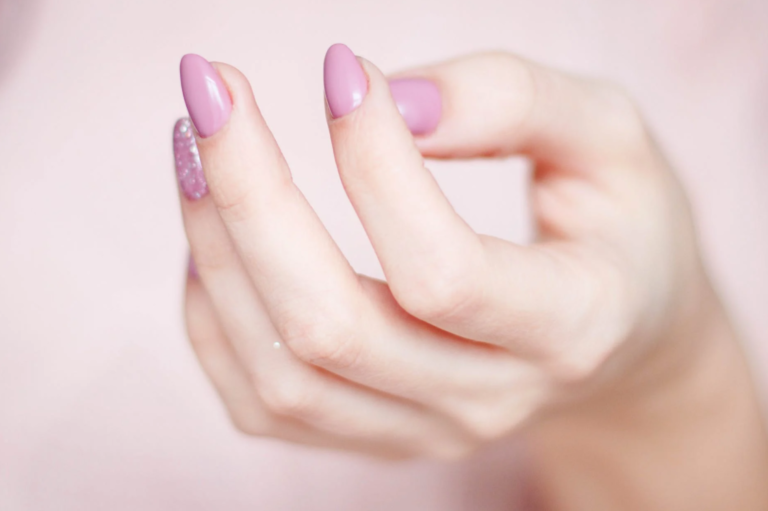
Now that you know the secrets on how to remove acrylics, it’s time to roll up your sleeves, turn on some Netflix, and take matters into your own hands. After you’ve safely removed your acrylics, throw on a pretty nail color and get on with your day!