How to Dermaplane From Home
Dermaplaning has been around for quite some time. Beauty professionals and beauty gurus alike have jumped on board. However, dermaplaning from home is quickly becoming more and more common. While this is a great idea in theory, there are a lot of issues when people start to dermaplane incorrectly. Lucky for you, I have made a quick guide explaining everything you need to know about how to dermaplane. Before you know it, you’re going to be the dermaplaning professional on your block.

Why Dermaplane?
What are the real benefits of dermaplaning? There are actually quite a few. Dermaplaning removes the top layer of skin. This means your skin looks fresh, glows, and is less likely to clog from buildup. It also can remove any peach fuzz that may or may not be a root of insecurity or annoyance for some of us. Lastly, it can help with anti-aging. Removing the dead layer of skin can help keep your wrinkles from forming or damage to the skin from showing up.
My favorite factor of dermaplaning is that it can remove acne scars over time without a pricey bill or painful procedure attached. For those of us who picked at our face all through our teenage years and are living the consequences in our twenties, dermaplaning might be your new favorite practice. All you need is a tiny scalpel, some guidance, and a few minutes of time.
How to
Now to the juicy part. Let’s talk about the proper way to start dermaplaning at home. To keep things as simple as possible, here is a step by step guide:
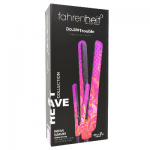
1. Grab a dermaplane tool.
This is the tiny scapal that you may have seen on all the beauty guru’s Instagram. While these are as sharp as a professional dermablade, be careful when you are using this. It is a blade after all. I recommend switching blades after at least a month. Be mindful of the level of quality of your dermablade. The cheaper it is, the quicker your blade will need replacing and vice versa. This also will affect how well it grabs all the dead skin and peach fuzz.
When we are talking about blades on our face, it’s best to invest in quality and let your face benefit rather than trying to save an extra buck. Trust me, you’ll thank me later on this one.
2. Wash your Face
While dermaplaning does help remove any unwanted dead skin, we want to give it all the help it can get. This means creating a clean space to work with. Wash your face with a gentle cleanser, removing any makeup, grime, or other buildup that could have accumulated on your face throughout the day. PAy attention to the word gently. We don’t want to irritate our skin prematurely. Aside from dermaplaning, I sure hope you are making this a regular practice after a long day of being out in the world. Wash your face!
3. Add an Oil or Lubricant
I like to add something to help the blade glide across my skin. For me, aloe vera is a great option. It helps reduce inflammation of the skin, which is quite common after dermaplaning, and its slimy texture keeps me from nicking my skin. It also has loads of benefits for your skin regardless of dermaplaning, so kill two birds with one stone.
4. Bottom Up
When you start dermaplaning, be sure to go from the bottom up. Not only is this the most efficient when it comes to the dead skin and peach fuzz that you’re removing, but it also will get the closest shave to ensure you are going to get the best results. Small, efficient strokes are the best method. Wipe the blade off in between to ensure you have a fresh shave each time. I like to run mine under water to help with efficiency, but you can also wipe the leftover skin and hair onto a towel or rag.
5. Add a moisturizer
Wipe off any excess oil, hair, or lubricant. Now it’s time to add some moisture into our freshly cleared face. Grab a light moisturizer and cover your face, rubbing upward gently. Never rub your moisturizer down. We always want to keep our skin upwards to give the appearance of a more youthful and fresh face.
6. Leave the Skin Alone
Like I mentioned, your skin will most likely be a bit red and more sensitive from the major shave it just got. This will go away after a bit, but it is best to leave your skin be until then. Touching your skin or attempting to wash it will only cause more irritation. Let your skin sit for a bit. It just got a deep shave!