It’s common knowledge among all skin experts that the best tan you can get is a fake one. One major cause of skin cancer, as most know, is sun exposure. Additionally, the sun is what causes skin changes that we associate with aging, such as sagging skin, wrinkles and dark spots. So, if you’re on the hunt for a beautiful summer glow, but would like to achieve it without the consequences of sun exposure, self-tanning is the perfect option.
Below, we’re going to give you all the information you need to learn how to self tan. So, keep reading and get ready for some insightful self tanning tips!
Step 1: Exfoliate
A problem that many self-tanners tend to encounter from time to time is streaky tanner. There’s a trick to achieving a long-lasting, even self tan and that’s – showering and exfoliating.
When you have dead skin cells on the surface of the skin, self-tanners work like food coloring that stain those dead cells. This is why the best way to apply to self-tanner is on exfoliated skin, since it will support you in sporting an even tan rather than a streaky one.
Since the tools used to exfoliate other parts of the body are rougher, be sure to use a quality facial cleanser when exfoliating the skin on your face. Also, during this time of showering and exfoliating your skin, if you want to get rid of any body hair, now would be the time to do so!
Step 2: Moisturize
Once you’ve gotten out of your pre-tan shower and dried yourself, it’s time to apply lotion. However, you want to avoid applying it everywhere like usual. Instead, focus only on areas that are dry, such as knees, feet, elbows, palms, ankles, etc. Otherwise, they may soak in too much color. As for the rest of your skin, make sure it’s dry and free of lotions or oils, as this will maximize how effective the self-tanner is on the skin.
Pro Tip: Just to make sure you don’t give yourself an accidental hair dye job, apply moisturizer to your hairline and brows as well.
Step 3: Protect the Hands
When using self tanner, it’s very common for hands to turn orange after the application. This is why we encourage you to keep them covered. Tanning mitts or latex gloves are especially useful for this process, as they prevent staining of your hands. If you happen to not have these materials on deck and you’re going to be applying the tanner with your hands bare, just be sure to lotion them up first. Afterward, wash your hands with a washcloth and cleanser.
Step 4: Apply the Tanner
Now that you’ve prepared your hands and body, it’s time to apply your tanner. Keep in mind, your skin needs to be thoroughly dry in order to properly absorb the product, so wait ample time after showering before you apply it. Place the tanner directly onto your gloves, mitt or hands and focus on a small section at a time. Be sure to apply the tanner in long, light vertical strokes until you see that it’s coming out even and smooth. On areas like your face, hands, elbows, ankles, neck and feet – go easy on the product.
Step 5: Clean-up Time
After you’ve gotten the self-tanner all over your skin, your next step is going to be toweling off any excess product on the skin around your joints. This will keep your faux tan even, seamless and lovely. Brush your elbows, feet, wrists, ankles and knees with a paper towel that you’ve dampened every so slightly and this will do the trick.
Step 6: Allow it to Develop
After tanning your skin, you’ll want to give yourself about 20 minutes before clothing your body. As for your next shower (or getting your skin wet whatsoever), you’ll want to wait 12 hours. This includes perfume and skincare products.
Once you do finally shower, it’ll be best to avoid taking a razor to your skin for any shaving for as long as you’ll want your tan to remain. Otherwise, your summer glow will drain along with your shaving cream.
If you absolutely have to get rid of some body hair, do so with a hair removal cream rather than shaving, as this will extend the life of your tan.
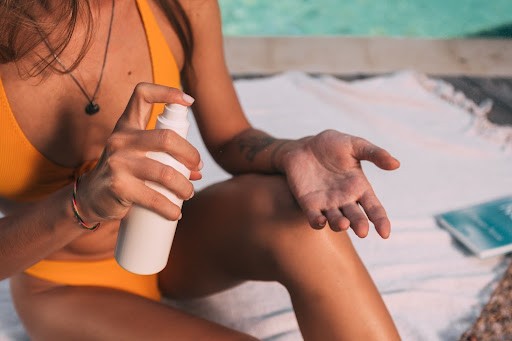
Step 7: Sunscreen
Lastly, if you want to keep your tan glowing and fresh for as long as you can, you’ll want to make sure you’re moisturizing your skin all over every day. Even better – wear a moisturizing sunscreen, since this will protect your self tanner as well as your actual skin from sun exposure. You may reapply your self tanner every few days or as needed to make your summer glow last!