Eyebrow mapping is fascinating every time I watch it. First there’s loads of lines created that don’t seem to make any sense at all and next thing you know it, two perfect brows appear! If you are perplexed just like I was, you are in the right place. I finally decided to cut the confusion out and learn exactly how brow mapping is executed for snatched brows every time.
Brow Mapping Process
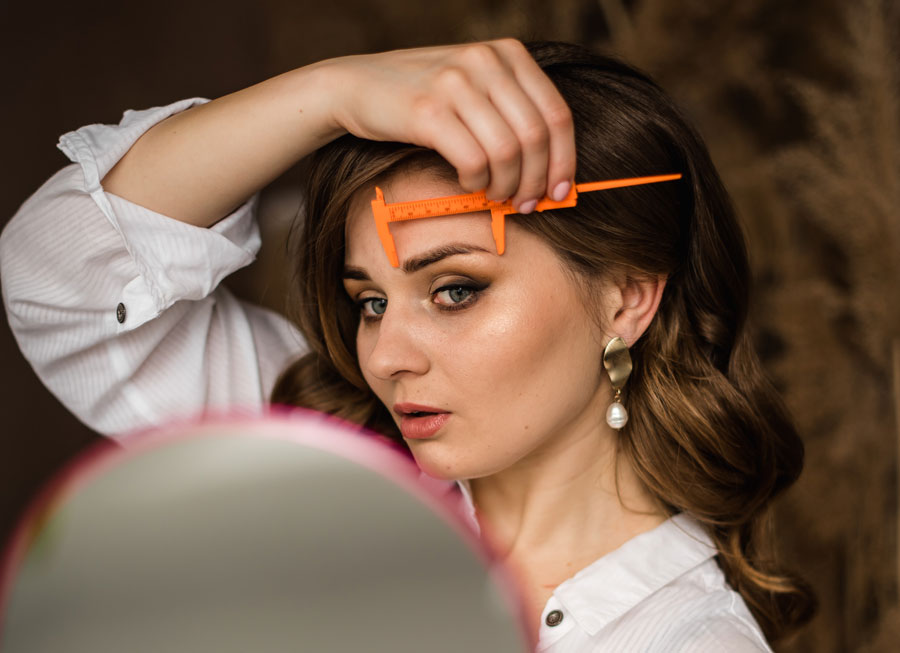
- Beginning, Middle, and End: First things first, you need to learn your own brows. This means finding each point of your brow. First is where your eyebrow begins. This might seem like an easy answer, but if you are an over plucker, you can’t simply look for the start of your eyebrow always. Take a straight object and line it up with the dimple of your nose. Create a line where it hits at your eyebrow and voila! You found the beginning of your brow.
Next is finding the middle or the arch of your brow. This is typically the most difficult. Grab that same straight object and point it from the dimple of your nose over the pupil of your eye onto your brow. This is the arch of your brow and should be marked for later!
Lastly, the end of your brow is found by tracing the dimple of your nose and the corner of your eye. This is the last part and hopefully the easiest to find! - Tracing: Now that we have found the three main points for our eyebrows, we need to trace those points together. This is where it gets complicated, so stick with me. Grab a string and some form of indicator like a brown shadow or eyebrow color. Line the string with it, and create a line between the two beginnings on the top and bottom of the brow.
Next, trace from the top beginning to the middle point on each brow, then the bottom beginning to the bottom of the arch. This will take a bit of personal judgement and practice, so give yourself a few tries to find the perfect point before pressing the string down.
Lastly, trace the arch of each the top and the bottom to the corner point, creating your full eyebrow shape! We will obviously wipe this tracing off later, but this creates our shape to microblade our brows, wax/pluck, or microblade them.
That is the most simple form of brow mapping for beginners! This is not something you would want to do every day, as it takes a lot of time to execute. However, for specific eyebrow focused jobs, it is the best way to find an eyebrow shape, so you don’t end up with too bushy or thin brows. We have all had this happen once or twice, and once you over pluck, there is no return for quite some time. Having a map to follow is quite useful.
Home vs Professional
If you aren’t confident in your own abilities at eyebrow mapping, there is no shame in that! It is always a good idea to seek a professional to get the job done correctly. I always recommend finding someone that incorporates brow mapping into the routine whether that be brow dye, waxing, or microblading. Ask questions upfront to make sure they are creating the best brow possible!
They will have had lots of practice to help perfect this look and give you the full effect that you might not be able to create at home. Plus, it’s always good to support your local businesses and pamper yourself in the process!
Daily Routine
So we aren’t trying to do the full brow mapping everyday, but what is the everyday routine for snatched brows? Even with brow dye or well waxed brows, some eyebrows need that extra umph with your daily makeup routine to push it over the edge to wow. Not to mention, now you have a good blueprint with our mapped brows that are already plucked or dyed to start from. Here are some of the best options for daily brow routines:
- Brow Powder: I love brow powder. It lasts forever, is quick to apply, and doesn’t involve much effort. Grab an angled brush, a powder that matches your brows the best, and start filling in any empty spaces in your brows. You do not want to use the powder at the start of your brow as it is much too harsh and difficult to create thin lines to look natural. Work within the brow and from the arch to the end to enhance the shape of the brow.
- Brow Pencil: Much more precise, a brow pencil can be used in each section of the brow, the thinner the pencil, the more natural the look will be. Fill in any empty spaces and create wispy lines that follow the hair on that section of the brow. This will take a bit of practice and precision, but can be amazing when perfected.
- Brow Gel: Lastly, if you are wanting to do the bare minimum or have filled out brows already, you can grab a brow gel and call it a day. This is a clear gel that holds your brows in place. Swipe the beginning of your brow up until you hit the arch and to the side from there!